Generating Payroll
1 – In this section you can:
o View previously generated payroll runs.
o Regenerate payroll to reflect on any changes or modification for employees
Salary. (Note: every time modifications are made to a payroll run, the user has to regenerate the payroll to reflect on the payroll run and reports provided the payroll for that particular month is not Approved “Closed”).
2 - Select the month & the year of the payroll that you want view and click “Go”.
3 – If the month has not been generated before, “Generate Payroll” Button will be
enabled. Click on that button and the payroll generation will start.
4- A progress bar will be displayed. Once it is completed, click on “View” to access the payroll data for that month.
5 – Total Salary by Currency will be displayed.
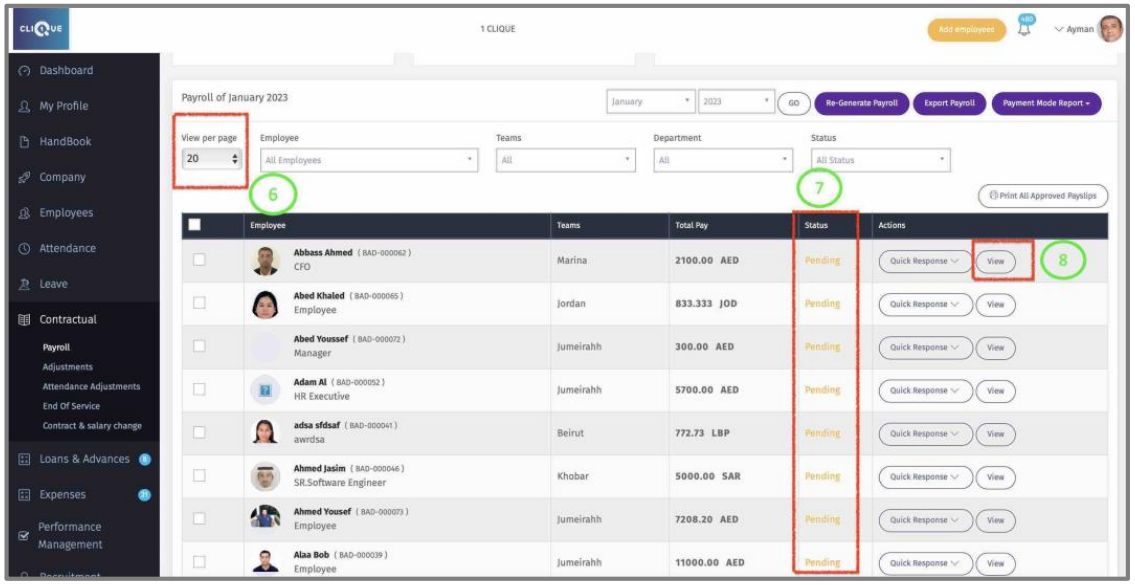
6 – List of employees will be viewed based on “View per page”.
7 – Employee Payroll status will be visible as per the following:
o Pending: The payroll for that employee has not been Approved.
o Approved: The payroll for that employee has been Approved (Closed).
o Paid: The Pay Slip for that Employee has been generated and a notification has been sent to Employee. Employee will be able to view & Print pay slip from
his/her 1CLIQUE account.
8 – Click “View” to access employee payroll data.
9 – Employee pay elements will be displayed such as monthly Salary and Deductions 7
Additions that were automatically generated by the system such as:
o Leave additions or Deductions.
o Expenses reimbursement.
o Loans & Advances.
o Overtime
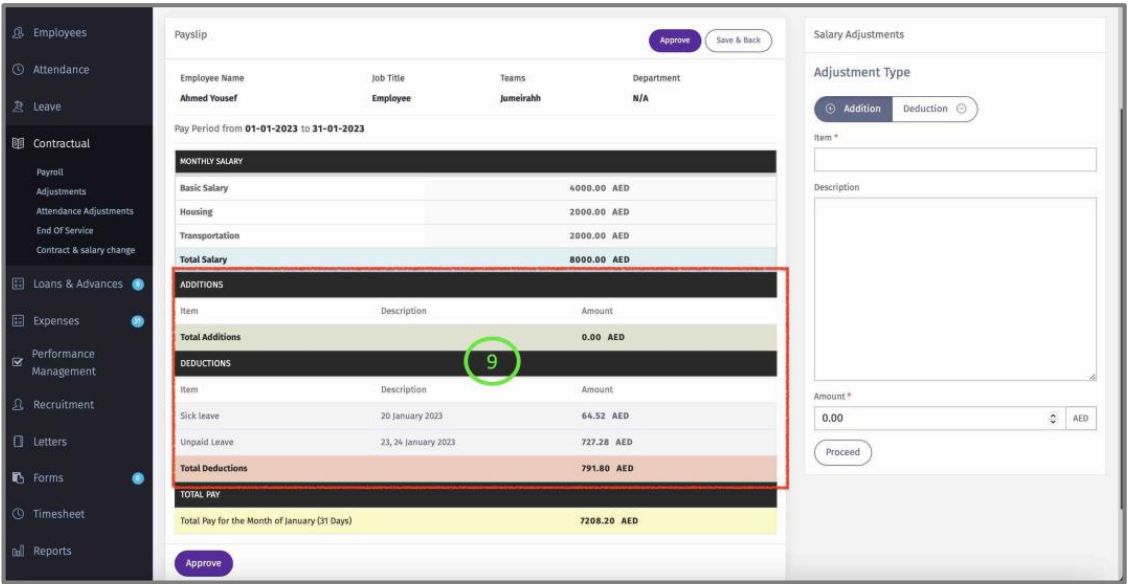
10 – In this section, ad-hoc additions & deductions can be added to employee payroll for
that month. Mass upload option is available see Adjustments.
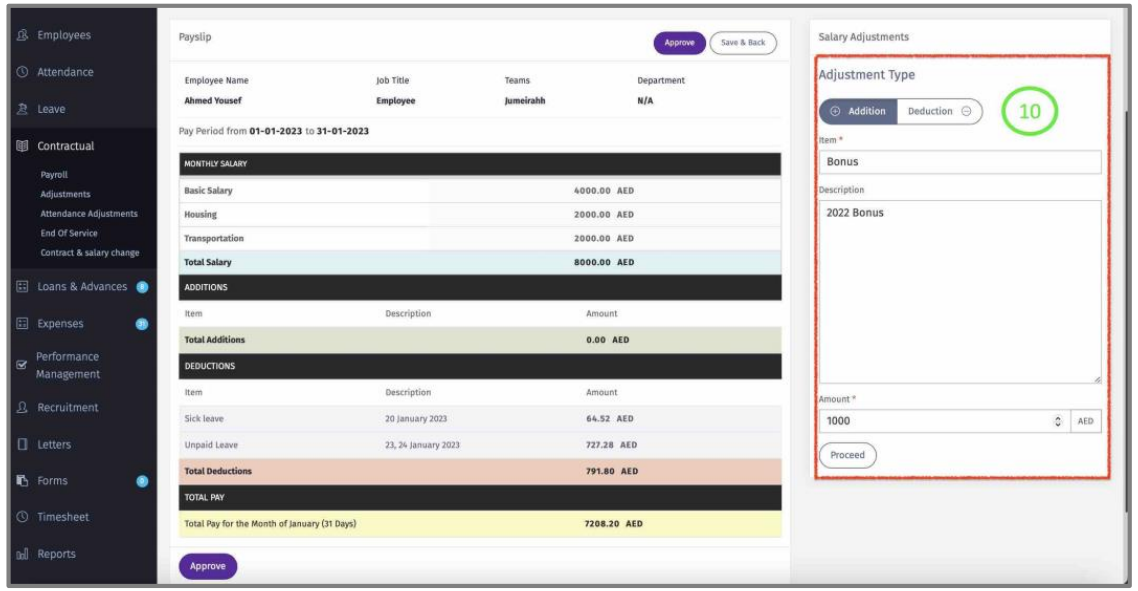
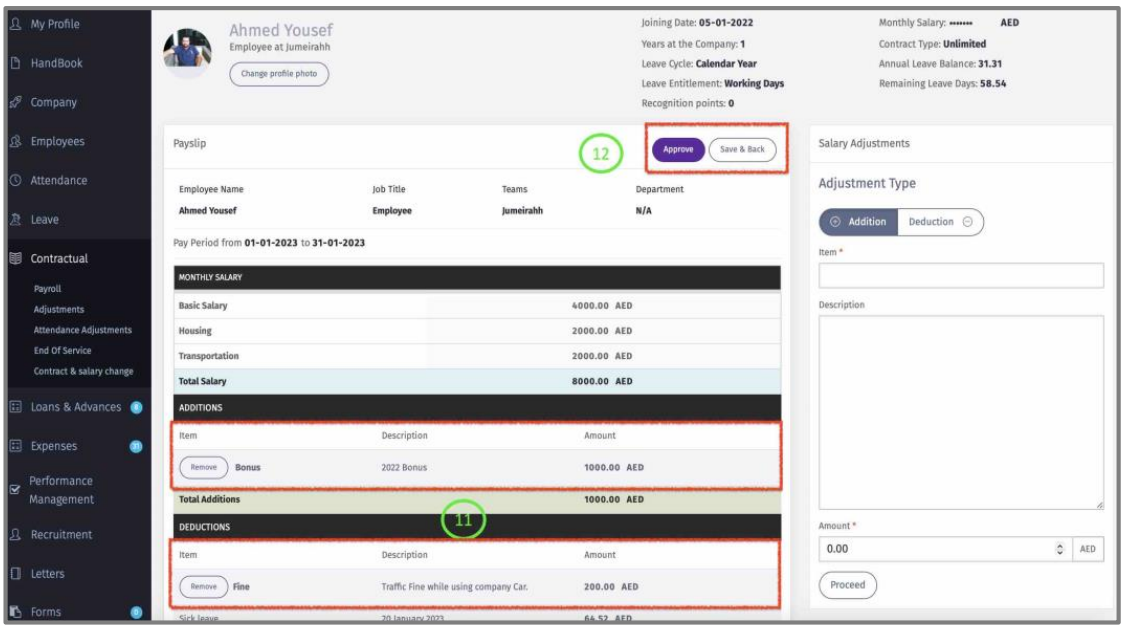
11 – The data will appear in employee pay slip as addition or deduction.
12 – Click on one of the following buttons once done:
o “Save & Back” to save all changes (Recommended).
o “Approve” to close the payroll for that employee.
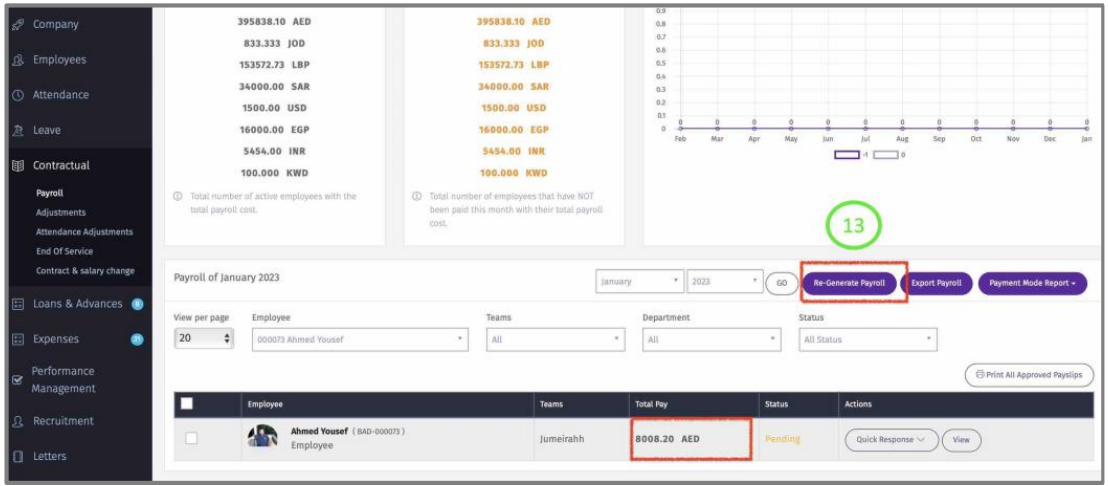
13 – Need to click on “Re-Generate Payroll” so
the changes (Additions & Deductions) that were made to the employee payroll reflects on the general payroll and the payroll reports.
14 – Click On ‘Quick Response” is you want to Approve this individua employee payroll.
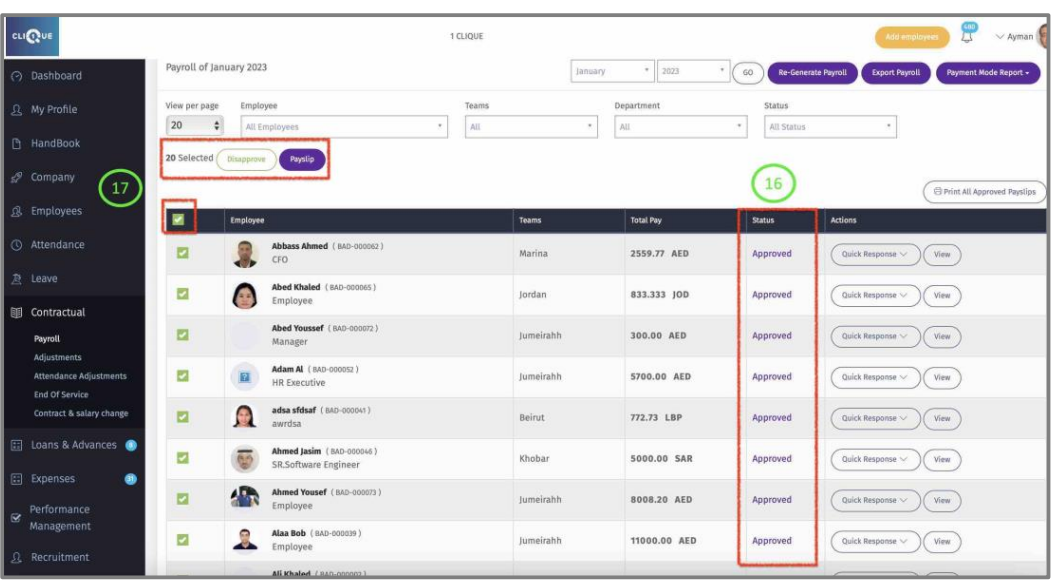
15 – Check the box to approve all employees displayed on that page.
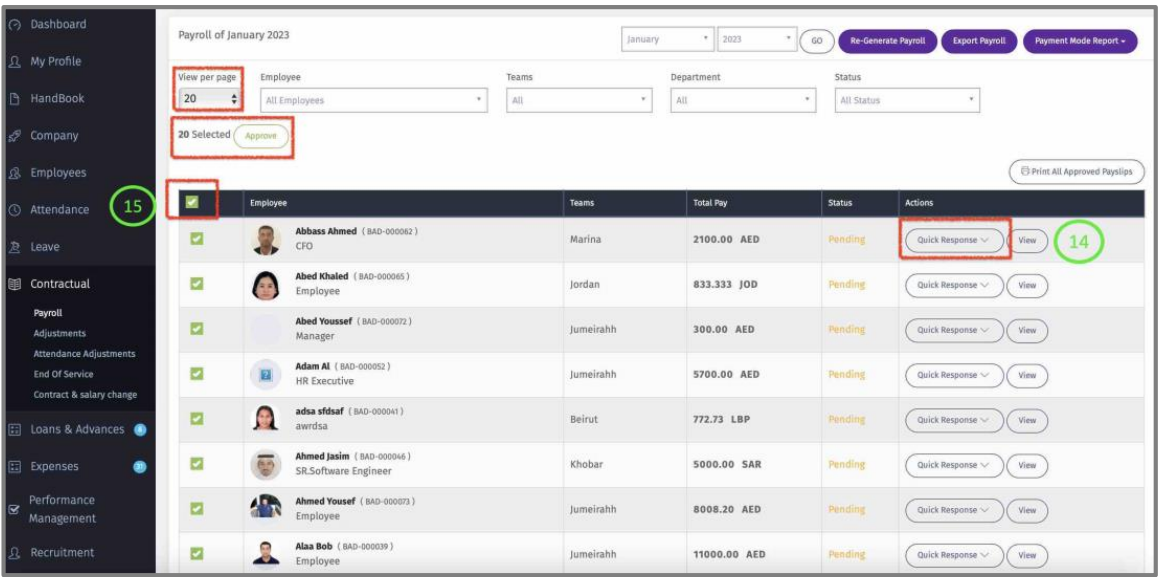
16 – Once Approved, the status of the employee payroll will change accordingly.
17 – Check the box:
o To Disapprove the payroll for all employees displayed on the page.
o OR click “Payslip” so a notification is sent to employees.
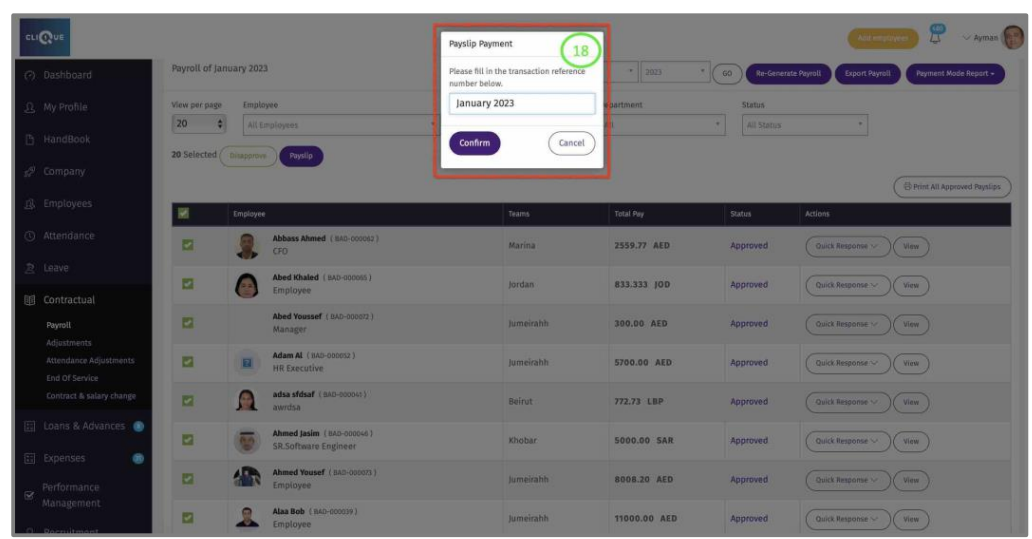
18 – Add a reference and click “Confirm”.
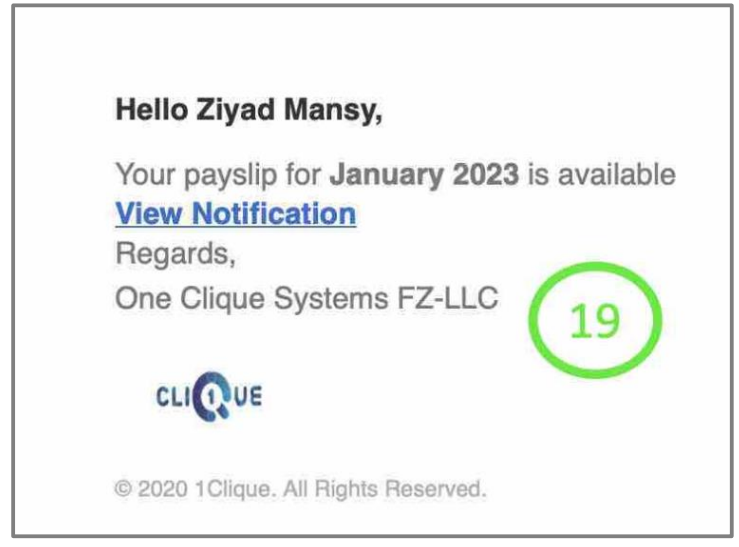
19 – Once confirmed, employee will receive an email notification that the payslip is available to view on his/her account.
20 – Click on “Quick Response” to disapprove or print the payslip.
21 – Click on “Print All Approved Payslip” to generate payslip for all Approved employee payroll.
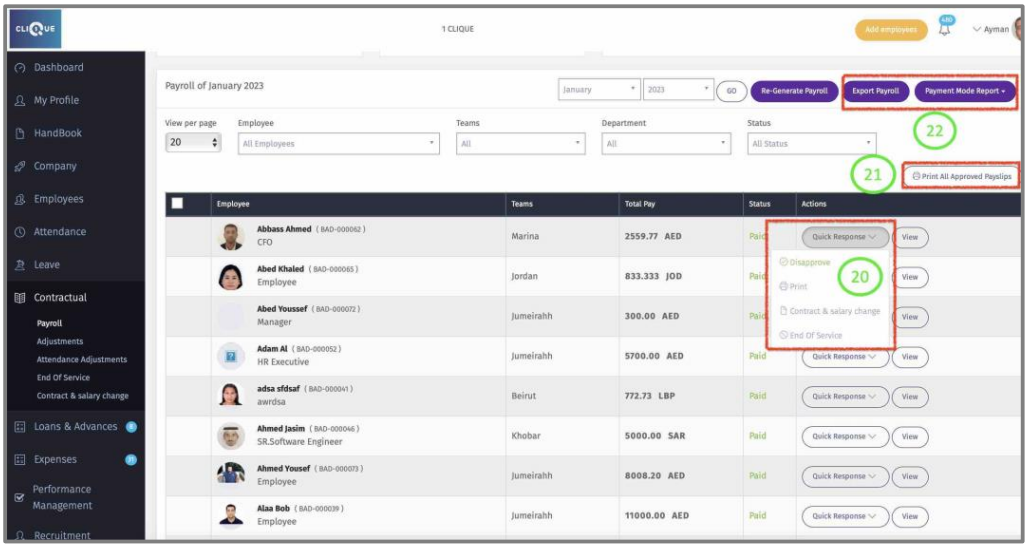
22 – Payroll reports buttons will generate the following:
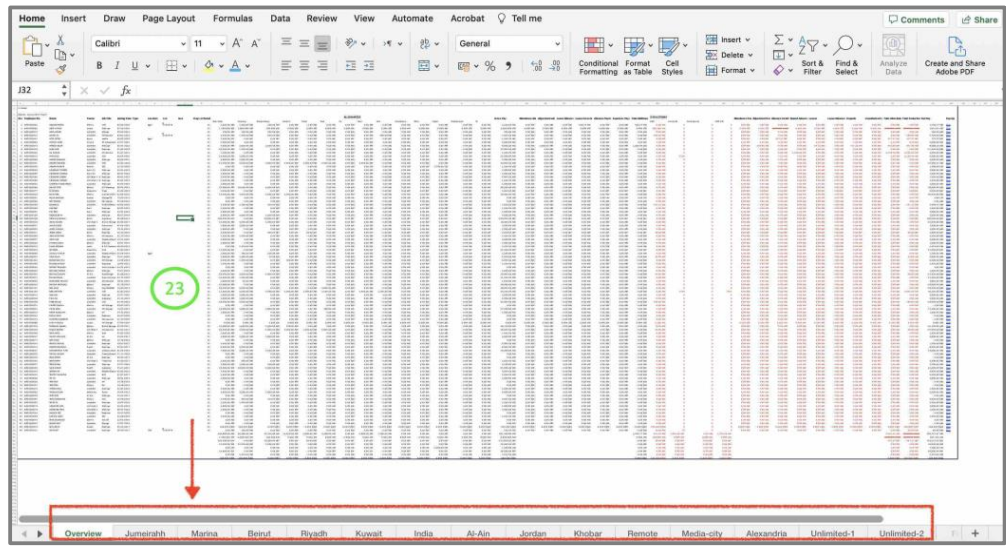
23 - Export Payroll. Shows all employee Salary, Additions,Deductions & Net pay.Also, it will create tab for each entity (Branch/department/team).
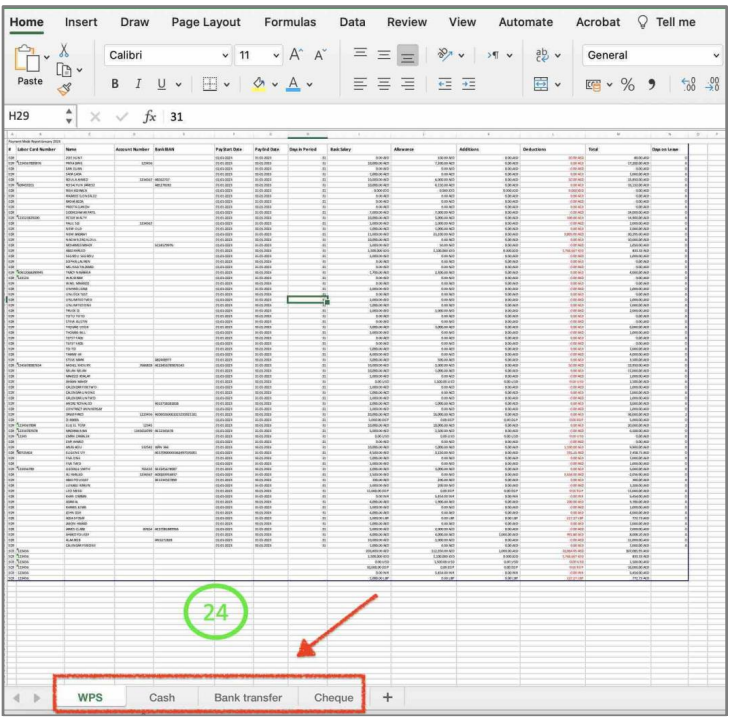
24 - Payment Mode: Will generate an excel sheet with different tabs to indicate
how each employee is being paid (WPS, Cheques, Bank Transfer or Cash).