View All
Here you can view all employee data.
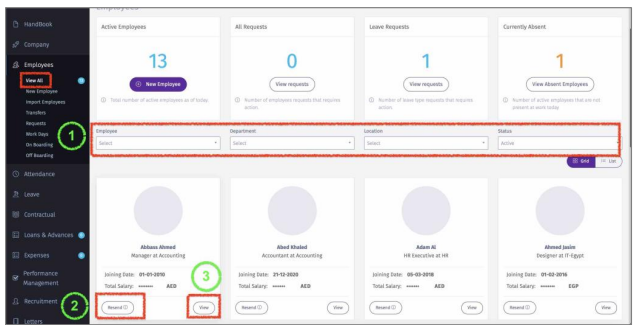
1 – You can filter by:
o Employee Name.
o Branch/Department/Team.
o Status: All, Active or Inactive Employees.
Send Activation Email to Employee:
2 – Click on “Resend” so an Activation email is sent to the new employee to activate his/her account. The Activation Email is valid for 24 hours only. You can repeat this process if employee did not activate within the specified time. The “Resend” button will disappear once the employee
activates the account.
View Employee Details:
3 – View the following Employee Details:
o General & Personal Details.
o Contract Details.
o Attendance Card & Configuration.
o Documents & Bank Details.
o Reward & Recognition.
o Handbook.
o Assets.
General Information:
You Can view edit Employee’s:
• General Information.
• Personal Details.
• Contact Details.
• Dependents Details.
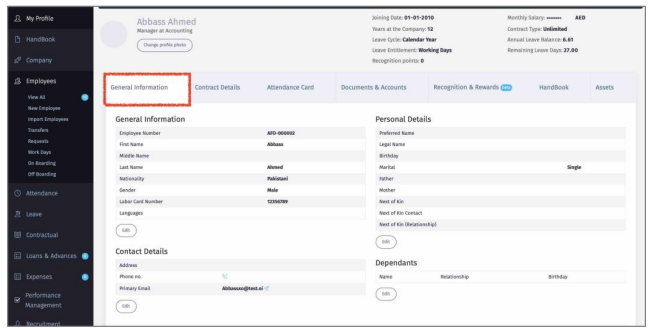
Contract Details:
All Contractual Details pertaining to Employee will be available here. This Page is not editable. Any
changes to this page must be performed in Contractual/Contract & Salary Change.

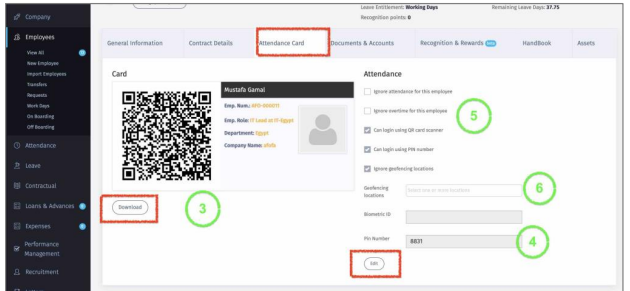
Attendance Card:
3 – Every Employee will have a unique QR code. This code can be used to check In & Out from office if the company using the 1CLIQUE Attendance App. The QR code can be downloaded or
can be found in Employee Self-Service App (1CLIQUE ESS).
4 – Similar to the QR Code. An employee can use their Pin Numeri stead of the QR Code to Check In & Out.
5 – You can configure Employee Attendance and Overtime eligibility.
6 – If the Company is using the Geofencing, here you can define the workplace of the employee.
Once this is activated, the employee will only be able to Check In & Out in the selected location(s)
using the 1CLIQUE ESS.
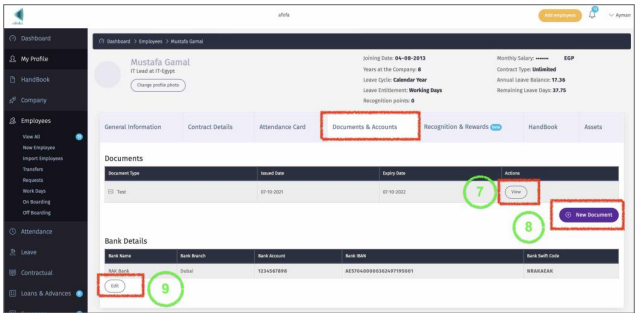
Documents & Accounts
7 – Edit existing Document.
8 – Add a new document.
10 – Add/Edit bank details.
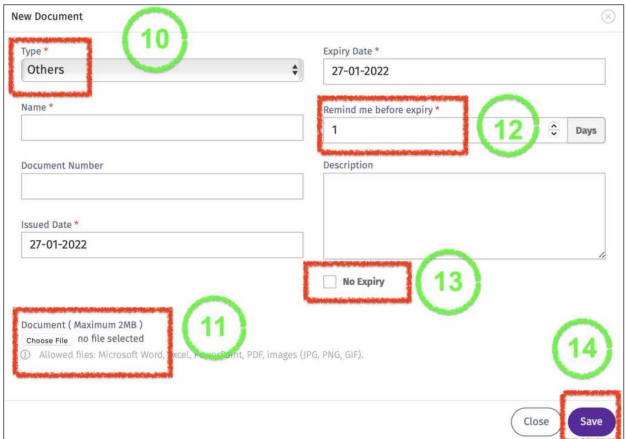
Add Employee Document
• Click On “Add Document” As indicated in Point 8.
10 – Select Documents Type or choose “Other” if type is not available.
11 – Upload document (Size should not exceed 2MB).
12 – Add number of days to remind Employee and User before document expiry.
13 – Check this box if document does not have an expiry date (e.g.,University degree).
14 – Click “Save” to store the document details in Employee profile.
 Recognition & Reward
Recognize your employee achievement with an instant fun way.
Recognition & Reward
Recognize your employee achievement with an instant fun way.
Setup Recognition & Reward
To utilize the Recognition & reward in employee profile, you need to, first, got to Company/Recognition & Reward.
A – Create Recognition by:
o Selecting an emoji from the list.
o Add a Description (e.g., “Achieving Target”)
o Add points (Value) to this Emoji. The value can also be negative.
o Click Add
B – Create an Award such as “Employee of The Month”. Add Value to this award, so it can be redeemed after employee accumulates multiple Recognitions, that is equal or greater than the
value of the Award.

18 – Click on “Give Recognition” to add a new one.
19 – Select from all available Options and state the reason.
20 – Click “Add” to save in Employee Profile.

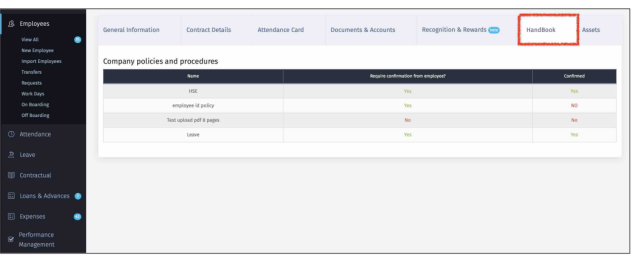
Handbook
This Page is just to view all items added to employee handbook, and to confirm if employee has read the
document(s) – if applicable.
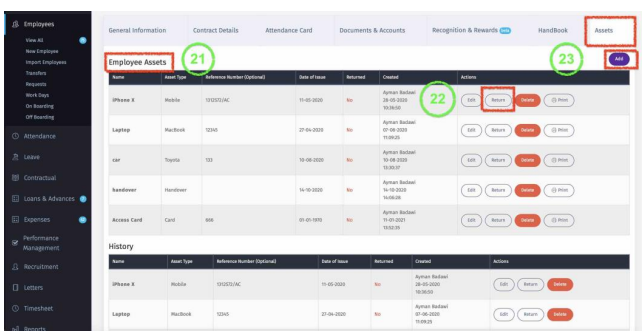
Assets
Here you can add company assets provided to employee. These Assets will be part of Employee ‘Off Boarding’ process.
21 – View existing assets provided to Employee.
22 – If any asset is no longer with the Employee, click on “Return” and it will be removed from
current assets and go to history.
23 – To add an Asset to employee, click on “Add”.
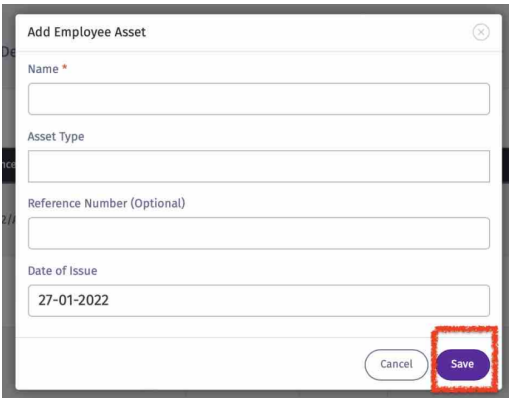
Add an Asset to Employee Profile.
• Enter all details and then click on “Save” to add to employee profile.