Setup
To configure Leave, you need to go first to Company/Company Setup.
ConfigureHere you can configure all Leave types by Entity (Branch/Department/Team/ Project).
1 – The Leave configuration will be based on the company structure (Branch,
Department, Team or Project).
2 - Click “Edit” to configure Leave for this entity.

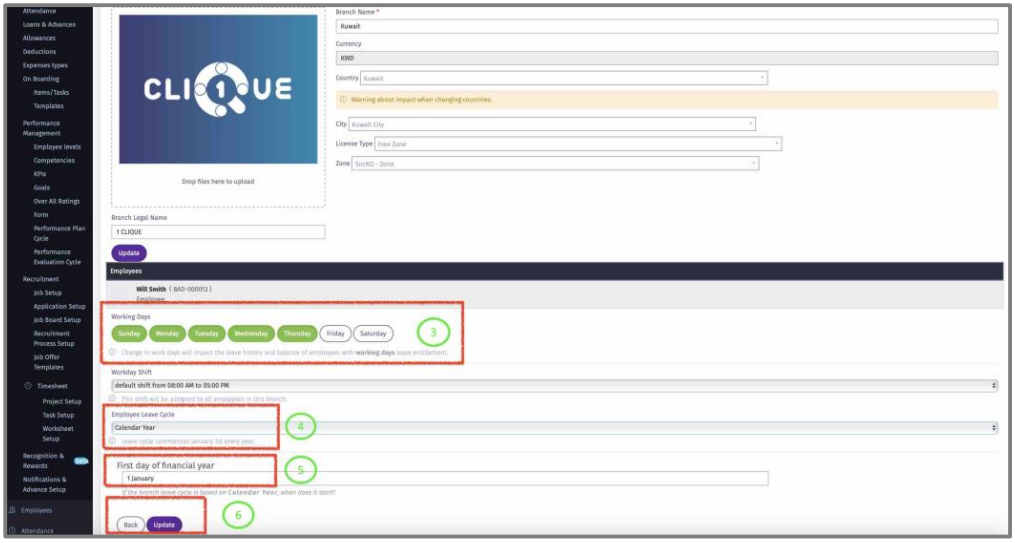
3 – In the Branch Tab, set the default working days for this entity.
4 – Select the default Annual Leave Cycle for this entity from the dropdown list. If “Contract Anniversary” is selected, then the leave cycle will be based on employee joining
date. If “Calendar Year” the Leave cycle will start on specific date and end on a specific date, regardless of the joining date of the employee.
5 – This field will appear if “Calendar Year” is selected. Here the start date of the Calendar
year cycle is determined.
• 6 – Click “Update” to save changes.
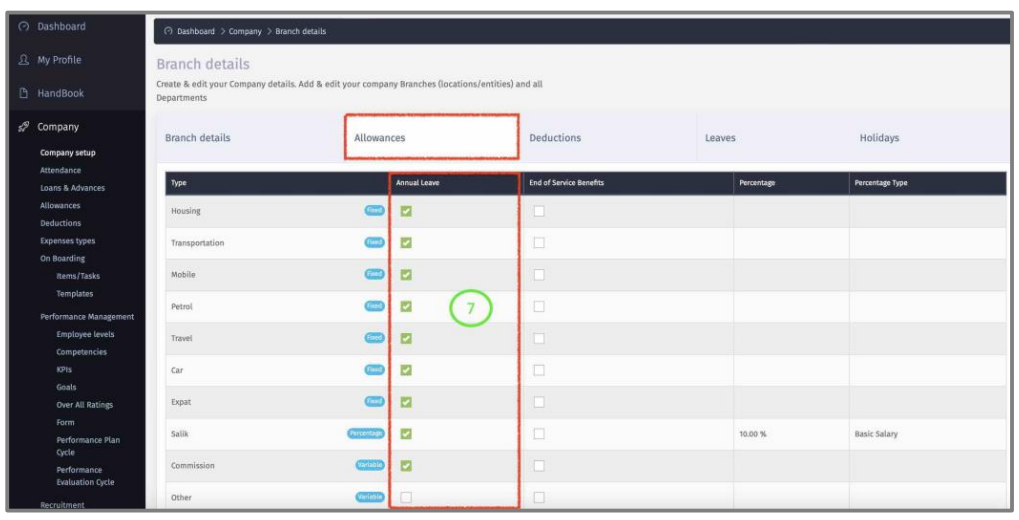
7 – In the Allowances Tab, select all allowances that will be included in the Leave calculation.
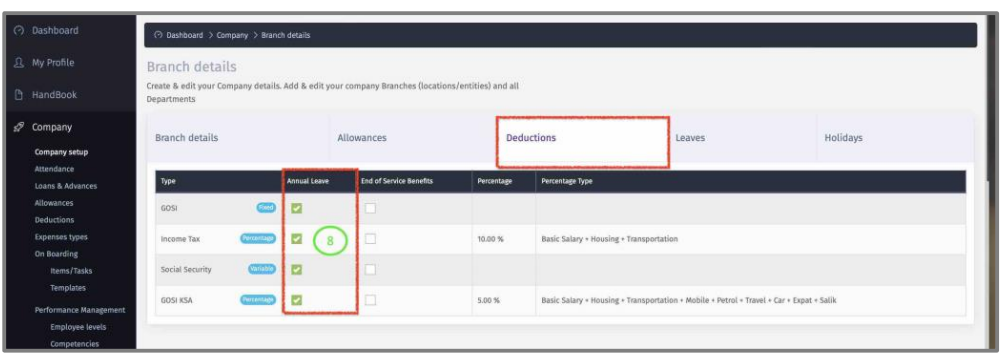
8 – In the Deductions Tab, select all Monthly Deductions that will be included in the
Leave calculation.
9 – In the Leaves Tab, select from the dropdown list if the annual leave is Working or calendar days.
10 – Check the Box to allow employee to request half a day leave.
11 – Add “Blackout Time” to stop employees from applying Leave during that period.

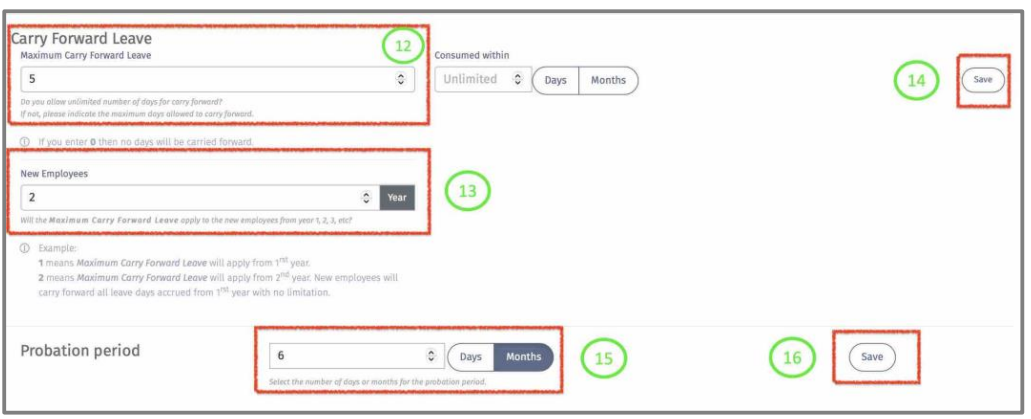
12 – Define the maximum annual leave balance that an employee can carry forward from previous cycle (year).
13 – Define if the carry forward rule applies to employee from 1st year or 2nd year of joining.
14 – Click “Save” to update changes.
15 – Define the default probation period by months or days.
16 - Click “Save” to update changes.
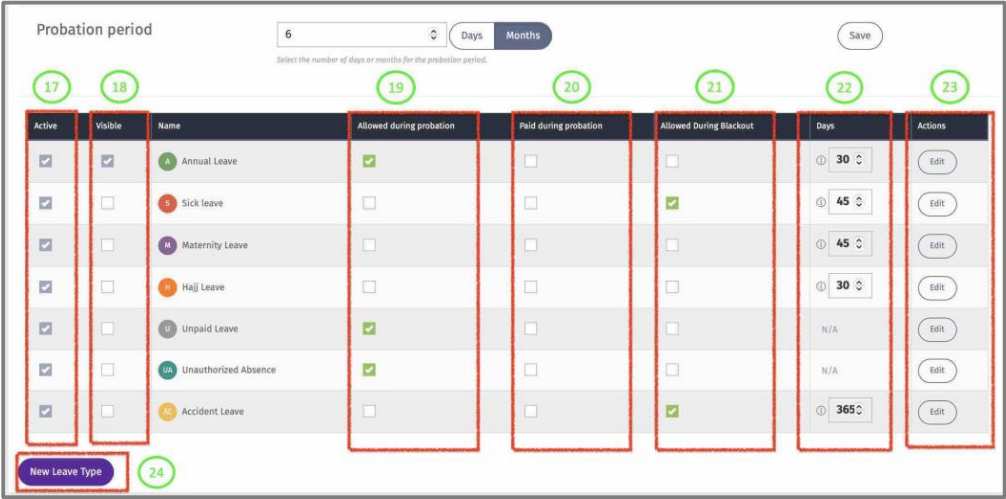
17 – The default Active Leave Types based on the country of the entity.
18 – Check the box so this Leave Type entitlement (number of days) is visible in employee leave dashboard. (If this box is unchecked, the employee will still be able to apply for this leave).
19 – Check the box to permit the employee to apply for this leave type during probation period.
20 - Check the box to include the employee leave balance of this type to be paid with employee final settlement (End of Service).
21 – Check the box to permit the employee to apply for this leave type during Blackout Time.
22 - View default Leave Entitlement for every Leave Type.
23 – Click ‘Edit” to modify default configuration for the selected Leave Type.
24 – Click “New Leave Type” to add a new Leave Type for this entity.
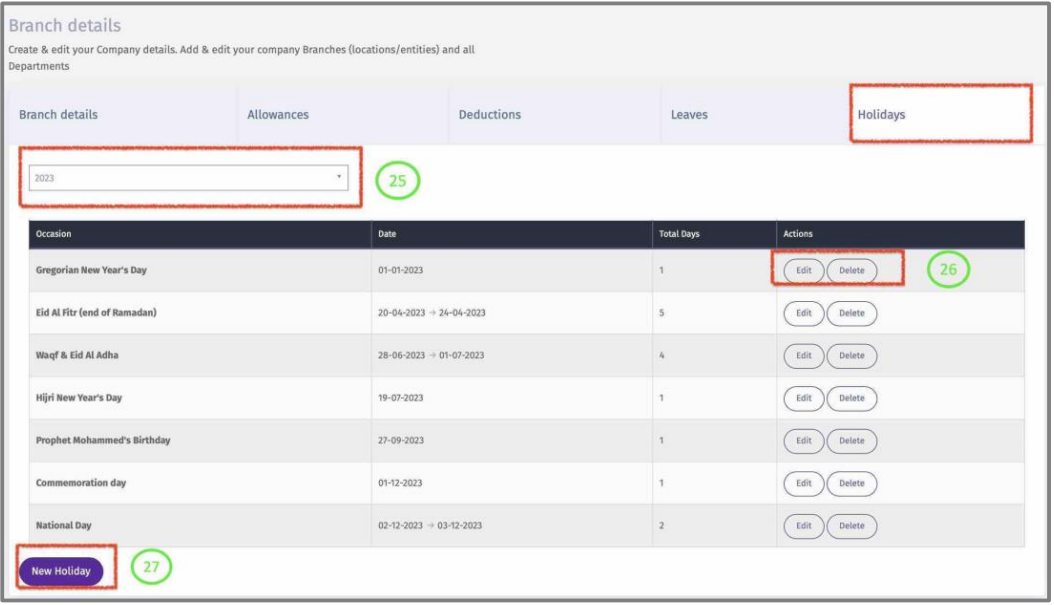
25 – In the Holidays Tab, the default Public Holidays for this year will be displayed based on the entity’s country.
26 – ‘Edit” the dates or name of this Public Holiday. “Delete” this Public Holiday.
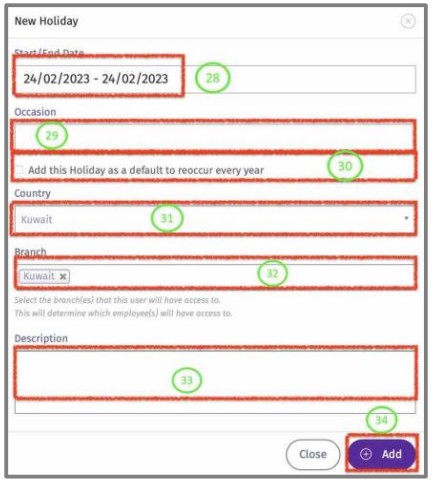
27 – Click “New Holiday” to add a new Public or Company holiday for this year.
28 – When adding a new Public Holiday, add the dates of the holiday.
29 – Give it a name.
30 – Check the box, if this Public Holiday will reoccur every year.
31 – Select the country of the Public Holiday.
32 – Select all the entities to add this Public Holiday.
33 – Write a description.
34 – Click on “Add” to update.