Employee
Here an employee can request a Loan & Advance from his/her account.
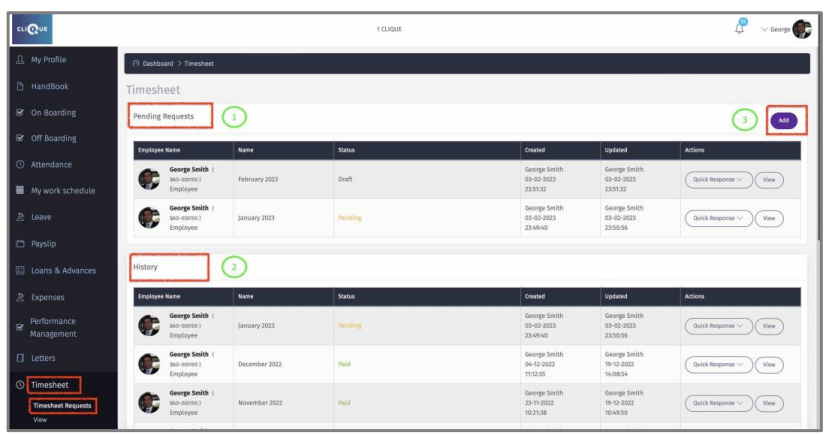
Create a Timesheet
1 – View “Pending” request that were submitted.
2 – View “History” of all requests.
3 – Click “Add” to create a new Timesheet.
4 – Enter Time Sheet Name.
5 – Data will be displayed if is part of the Setup Configuration. See above.
6 – Click “Create” to start adding tasks.

7 – Click ‘Add Task” to star adding items to the worksheet.
8 – Select form the dropdown boxes the applicable Project & Task.
9 – If the manual option is not activated, the employee will be prompted with “Start”.
When employee click that button Check-In time will be displayed. Also, “End” button will be displayed to end the task and to record Check-Out.
10 – If “Complete Manual” is visible, then the employee will be able to add Tasks with all relevant data manually.
11 – Click “Back” to save as a draft.
12 – Click ‘Submit For Approval” to send the Timesheet Request to manager for approval.

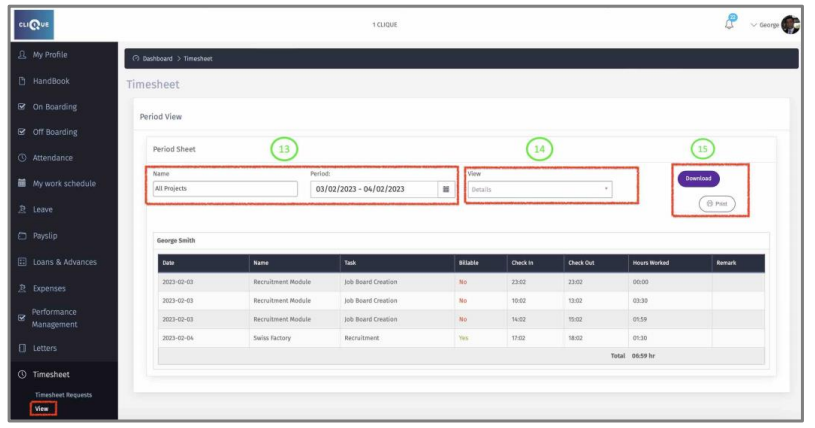
View
13 – Select The project(s) & Date range.
14 – Select ‘View” options (Summery or Details) to display all the relevant data.
15 – Click on “Download” to extract data in excel format OR “Print” to extract data in PDF format.